
MSL Mission Gallery

Artist’s Concepts
Rover Construction
Test Rovers
Component Images
Spacecraft&Rover Testing
MSL Component Delivery to KSC
MSL Delivery to KSC
MMRTG Delivery to KSC and Processing
Descent Stage Processing
MSL Final Processing
Backshell Processing
Altas V Rocket Delivery to KSC
Atlas V to Launch Pad
Atlas V Launch Pad Processing
Centaur Installation on Atlas V
Payload Fairing Delivery to KSC
Payload Fairing Installation
Spacecraft Rollout
MMRTG Rollout
Atlas V & MSL Rollout
NASA Tweetup
LAUNCH
Launch Photo Series
Landing inside Mission Control
Full MARDI Still Imagery
Initial Surface Images: ODY1 ODY2 Other
MRO captures descending MSL
MRO – MSL Landing Site Images
Sol 2 – Full Frames
Sol 2 – All NavCam Photos
Sol 3 – First MastCam Images
Sol 3 – MastCam Images
Sol 10 Image Gallery
Sol 12 – NavCam Images
Sol 13 Image Gallery
Sol 14 Photos – Robotic Arm Deploy
Sol 15 Images – Steering Actuator Checkouts
Sol 16 Images – First Drive
Sol 17 Images – MastCam Shots
Sol 21 – Photo Gallery
Sol 22 – Photo Gallery
Sol 26 – Photo Gallery
Sol 27 – MastCam Images of Rock Formation
Sol 29 – Photo Gallery
Sol 30 – Photo Gallery
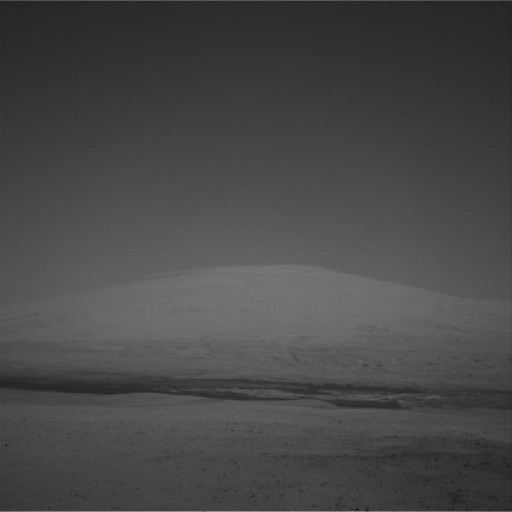
HiRISE Images (Sol 26 Position)
Sol 32 – Photo Gallery
Sol 34 – Photo Gallery – MAHLI Cal Target
Sol 36 – Photo Gallery – Sample Inlet Tests
Sol 37 – Photo Gallery – Transit of Phobos
Driving Sols 38 through 41
Sol 39 – MastCam Photos – Rock Formation
Sol 42 – Photo Gallery
Sol 44 – First Contact Science Target
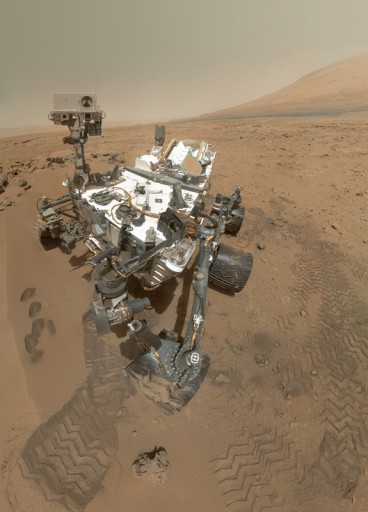
Sol 45 – Rover Self Shots
Sol 46 – Contact Science Images
Sol 48 – MSL departs Jake Matijevic
Sols 53/54 – Contact Science Operations
Sol 58 – Rocknest (Robotics, MAHLI)
Sol 59/60 – Rocknest
Sol 64/65 – Benign Plastic and MastCam
Sols 66-70 – Operations at Rocknest
Sols 71-75 – Operations at Rocknest
Sol 82 – Photo Gallery
Sols 84 through 89 – Top Photos
Sol 93 – 5th Scoop Sample
Sol 95 – Observation Tray
Sol 100 – On the Move Again
Sols 100-105
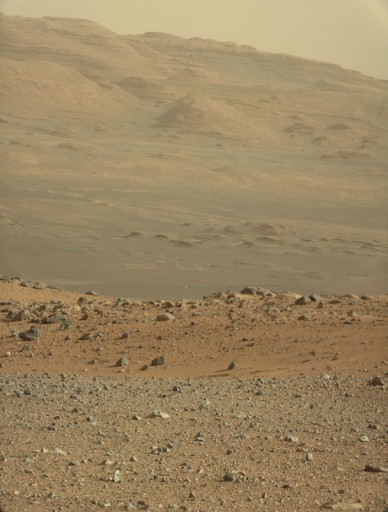
Point Lake Panorama
Sol 113 – Near Point Lake
Sol 116 – Photo Gallery
Sol 117 – Photo Gallery
Sols 119 – 124 – Road Trip Gallery
Sol 125 – 127 Gallery
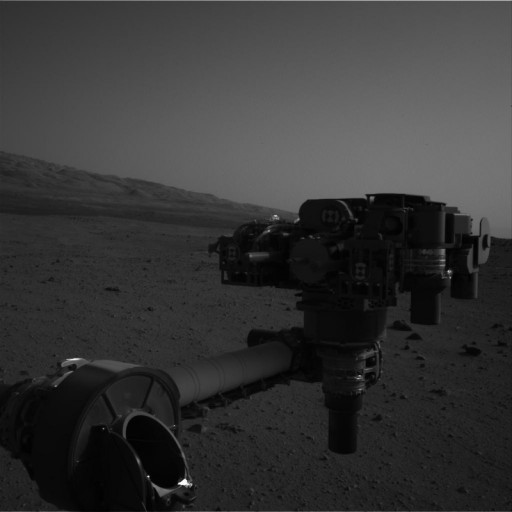
Sol 128 – MSL Turret Survey
Sol 129 – Robotics
Sol 130 Gallery
Sol 132 Gallery
Sol 133 Gallery
Sol 136 Gallery
Sol 137 MastCam Gallery
Sol 141 MastCam Gallery
Sol 149 – Snake River
Sol 150 – Brush
Sol 154 – Yellowknife Bay
Sol 159 – MAHLI Operations
Sol 160 – Near John Klein
Sol 165 – Night Imaging Session
Sol 165 – Night Sky Imaging
Sol 168 – John Klein
Sol 169 – Drilling Preparation
Drill-on-Rock Testing
Sol 182 – Full Drilling
Sols 215 through 235
Post-Conjunction Photos
Sols 270 through 277
Sol 279 – Second Drilling Operation
Sol 292 – Night-Time Operations
Sols 302-305 – Re-Visiting Point Lake
Sol 312 – Sunset
Taking a second Look at Shaler
Sol 317 – Phobos in the Sky
Starting the Journey to Mt. Sharp – Sols 324-327
Sol 344 – Panorama
Sol 351 – Phobos transits Deimos
Road Trip Photos – Sol 356-378
Waypoint 1
Road Trip – Waypoint #1 to #2
MSL Gallery December 2013
HiRISE Image December 2013
MSL Gallery January 2014
Earth Photos – Sol 529
MSL Gallery – February 2014
MSL Gallery – March 2014
MSL Gallery – April 2014
HiRISE Image – April 2014
May 2014
June 2014
July 2014
August 2014
September 2014
October 2014
November 2014
December 2014
January 2015
February 2015
March 2015
April 2015
May 2015
June 2015
July 2015
August 2015
September 2015
October 2015
